★ Beat print – get early access to the news by signing up to the Sporting Gun newsletter here ★
New stocks for old
Discover the secrets of stock refinishing as Guy Maddocks takes you through a step-by-step process to revitalise your shotgun’s appearance
So you’ve got your lovely Turkish OU or tired-looking Spanish SBS and fancy giving it a bit of TLC and – more importantly – have a good three to four weeks when you can be without the gun you intend to work on.
First, I’d just like to say for the record that I am certainly not a professional woodworker, cabinet maker or stock refinisher – but then probably neither are you. I have, however, given a fair few of my personal gun stocks a refresh and with practice and a good deal of patience most have turned out pretty darn well if I say so myself.
So there’s no reason why you too cannot achieve a very presentable best oil finish by following these simple steps and by taking your time. With patience and practice you should end up with a very nice-looking gun you can be proud of. The time involved in achieving this finish is why those that do this for a profession charge what they do.
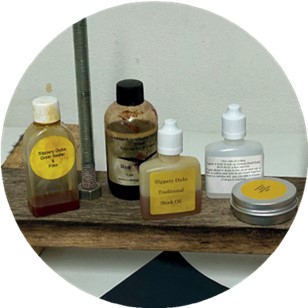
So if you want to give it a go, first get hold of or order all the items I have listed for the job. For drying between processes make up a stand similar the one pictured, or you can just put a wire coat hanger through the stock to hang it up.
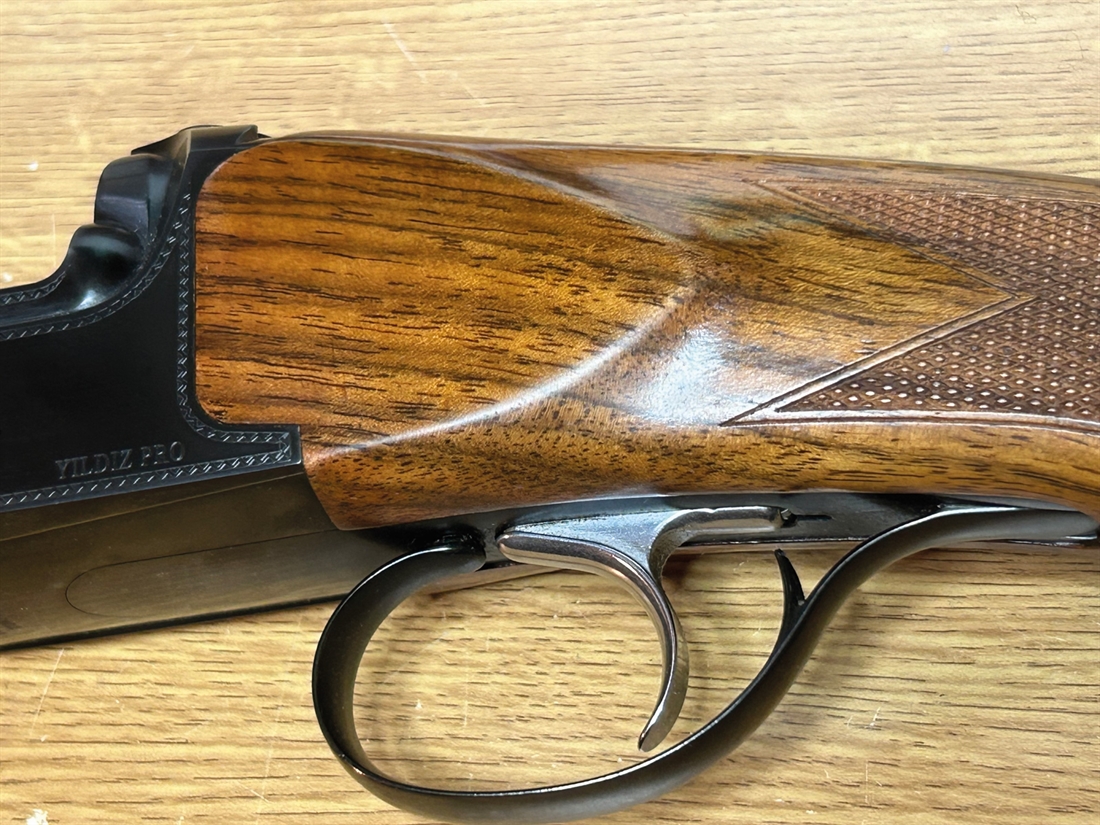
First remove the stock and forend (image 1). It is simply a case of removing the recoil pad, which is usually held in place with two screws and then removing the stock from the action with either a long flat-head screwdriver to remove the centre bolt or a socket and extension bar. Unscrew and remove the metalwork from the forend and put it aside. Take photographs if need be to remind you what goes where.
If your stock has a varnish finish you will need to remove it with paint stripper, which you can get from any hardware store. Following the directions, apply it with a brush. When the stripper has done its job, gently scrape it and the varnish away, being careful to avoid the chequering. Use a toothbrush in these areas. Some steel wool may help remove stubborn varnish. Wipe down with a wet cloth to remove any paint stripper residue.
If the stock has a different type of finish you can use acetone (nail varnish remover). Steel wool and acetone will remove most factory finishes or old oil finish. Again, use a toothbrush for the chequering.
Once stripped, give the stock a light sand with a medium grit 240 grit sandpaper on a 2×1″ wooden block, taking care to avoid the chequering and keep the sandpaper moving all the time. Don’t labour on one spot.
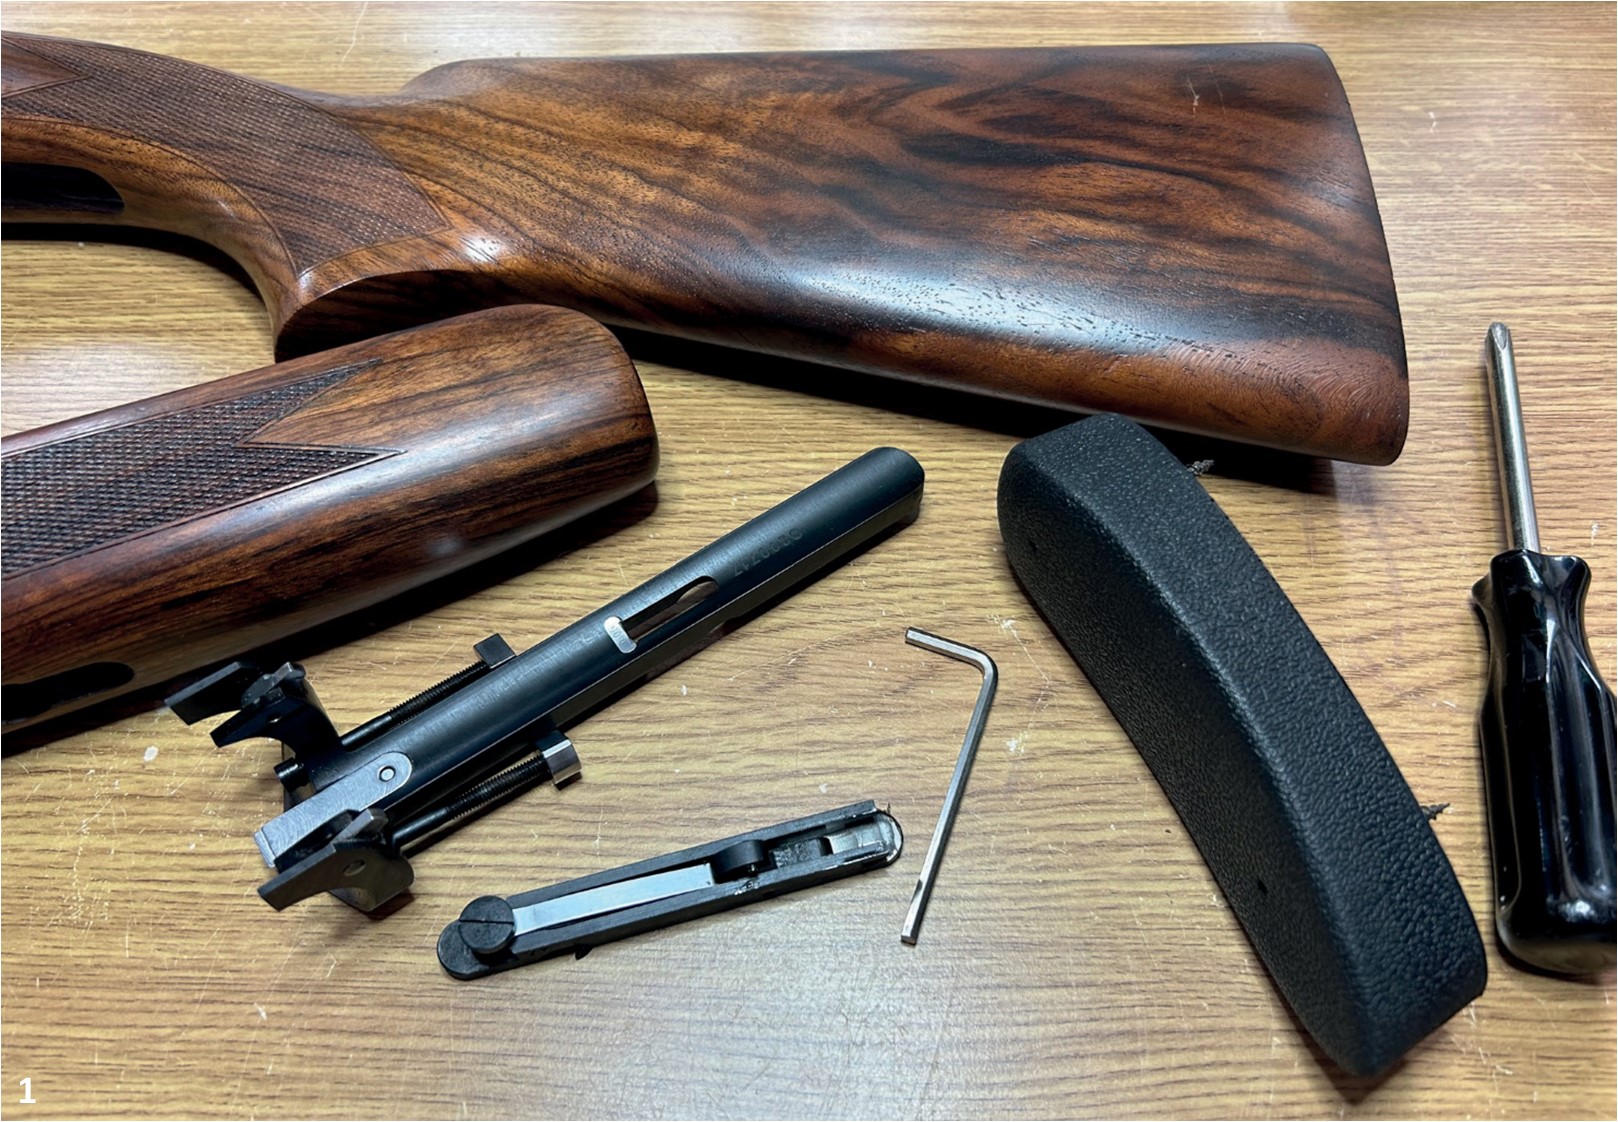
Now your stock and forend are stripped you can assess how it looks. A lot of the Turkish guns being sold in the UK now have truly stunning wood, but obviously the manufacturer has not spent two weeks finishing them as it would add greatly to the cost of the end product. As such, the grain tends to be fairly open, so to achieve a good finish you need to fill the grain or pores of the stock (images 2a & 2b).
To do this use stock grain filler, which you can buy online. It comes in two forms. The old-fashioned style is rottenstone powder, which you mix with stock oil and rub in. However, these days manufacturers now sell a premixed grain filler. One such, and a favourite of mine, is from slipperydicksgunwax.co.uk (I kid you not). CCL, Birchwood Casey and other manufacturers offer similar products too.
If you rub your hand over your stock and it feels a little rough, dampen the stock with a wet towel and then dry it with a hair dryer. This will raise the grain. Now give it a light sand with a fine sandpaper, always going with the grain, and wipe off the dust with clean kitchen roll.
Give the stock a wipe over with a clean wet cloth. What you see when the stock is wet is how it will look when finished, so decide at this stage if you want it darker. If you do, simply apply the alkanet oil with a cloth, including the chequering, and leave it to soak in over night. In the morning wipe it down with kitchen roll. If you think the alkanet may be a little too dark you can dilute it by adding around 30% white spirit to tone its colour down.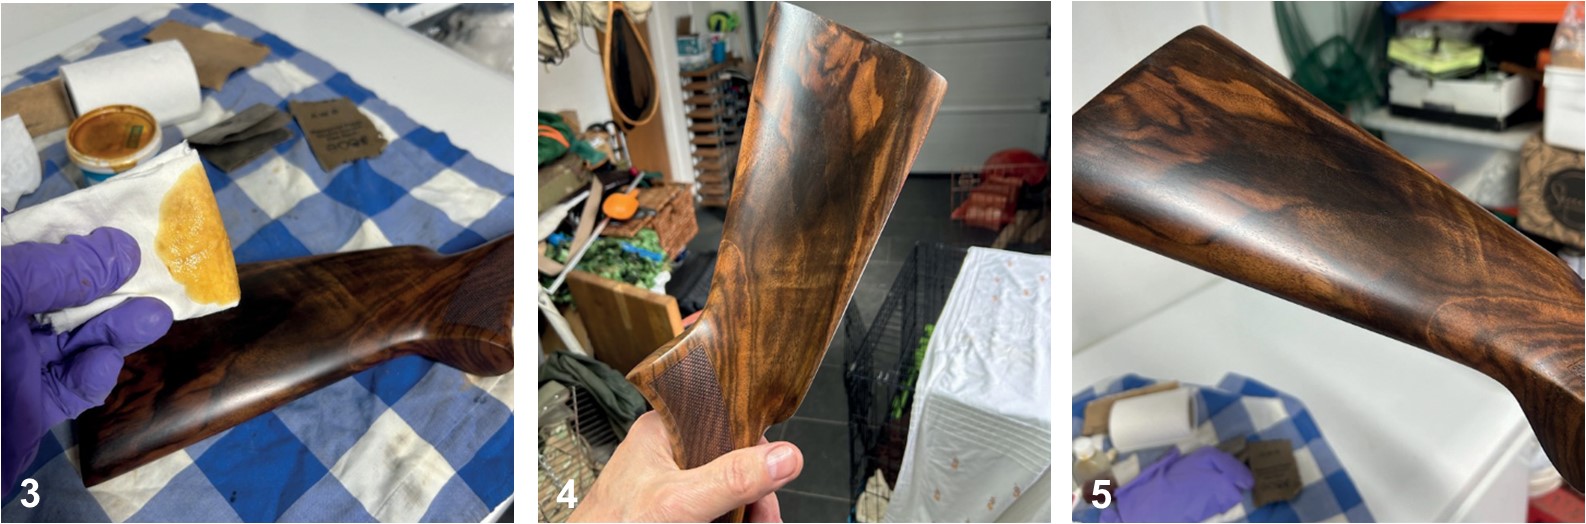
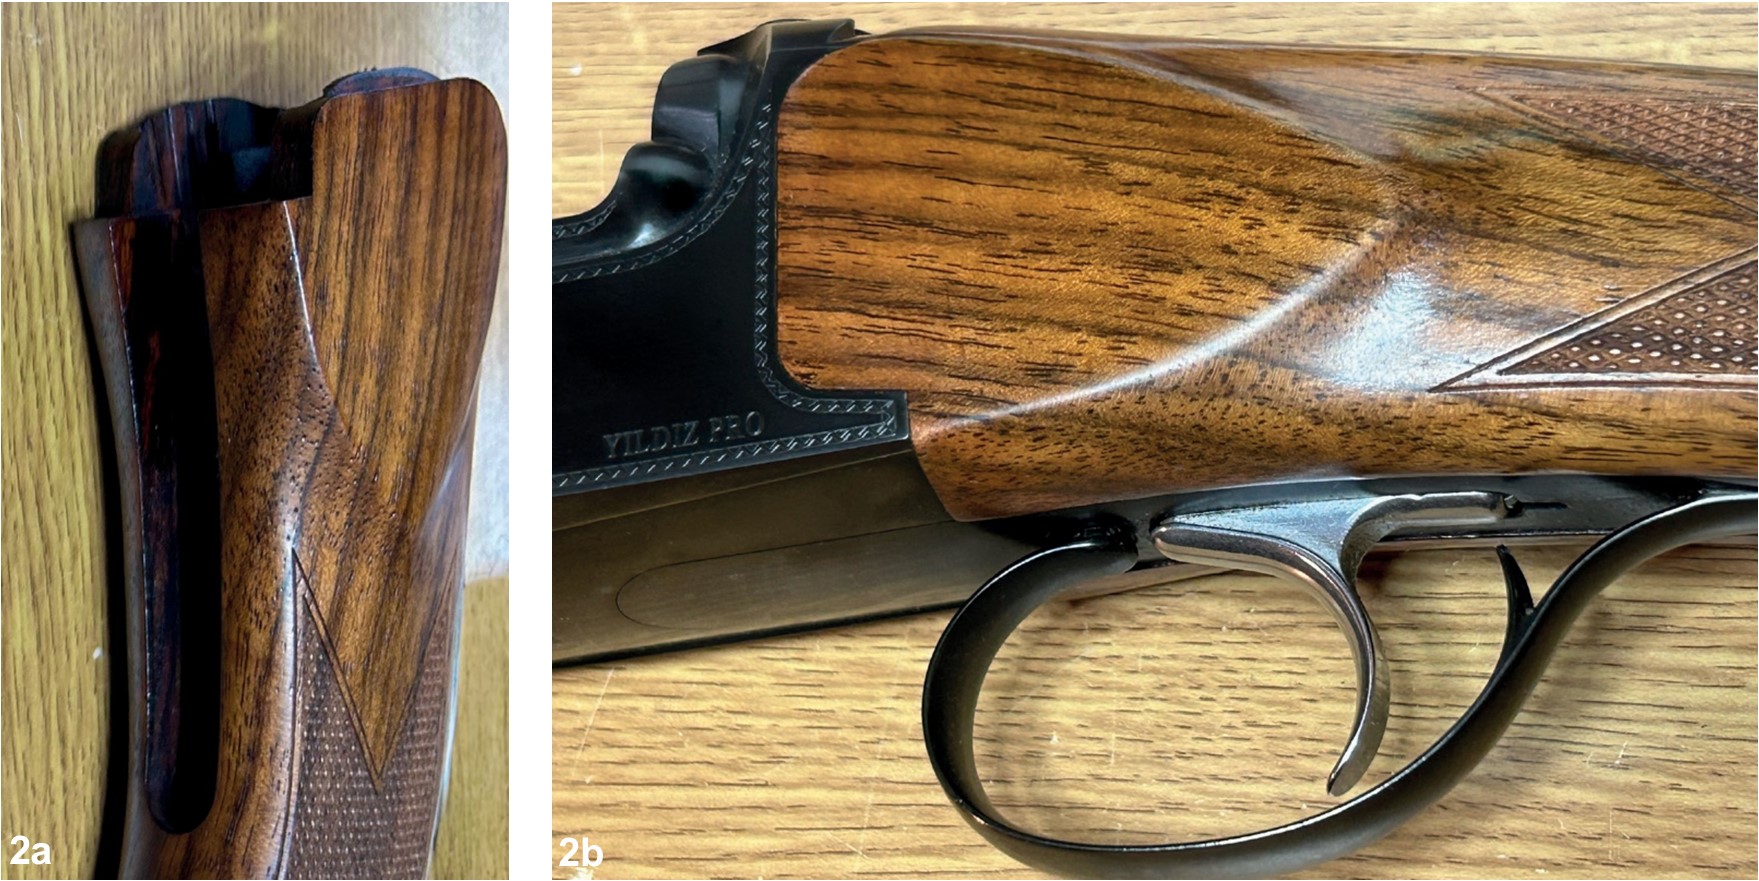
Now you can apply the grain sealer. Always shake the bottle thoroughly each time you apply; this goes for every application type, be it sealer or oil. Use a lint-free cloth, avoid the chequering and finish with straight strokes down to the butt to avoid streaks (image 3). Allow to dry for 15-30 minutes (image 4), then apply another coat and allow to dry.
After six coats leave it to dry for an hour or two or overnight. Once dry, take your 1000 grit wet-and-dry paper and give it a very light sand, going with the grain and taking care not to round off any edges. Wipe over with kitchen roll and apply another six coats of grain sealer. Allow this to dry, then sand it back and so on. Do the same with the forend.
If the stock is non-porous you may well be able to avoid this application, or at least after a couple of coats you will be good to go. But on my Turkish stock it took 36 coats before I was happy. Your stock should now be sealed and have a good basic flat sheen (image 5). Again knock it back with 1000 grit (image 6).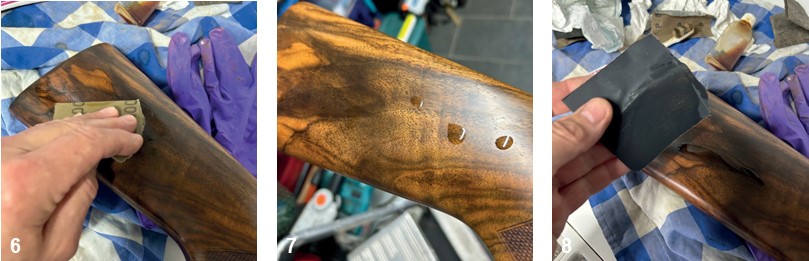
You are now ready to apply stock oil. To achieve the best finish you need to keep things dust free, so use a room where the dog doesn’t go. Placing a large cardboard box over the stock when drying is an option worth bearing in mind if there is any chance of dust or hair floating about.
If you want a matt finish to your stock, then after applying the stock oil in the morning – avoiding the chequering – and leaving it for at least six hours, wipe it off in the evening with a lint-free cloth or kitchen roll and buff with the palm of your hand to create warmth and leave it overnight. Apply more in the morning and repeating the process for 10-14 days until you are happy with the finish then leave for a week to dry thoroughly before reassembly.
For a gloss finish apply a very thin layer of oil, just three or four drops per side, and rub in with your finger (image 7). Finish with brush-like strokes to avoid streaks and leave to dry over night. After six coats, wet sand gently with a little stock oil and 1200 grit wet and dry (image 8). Repeat the oil application for another six coats and then wet sand back.
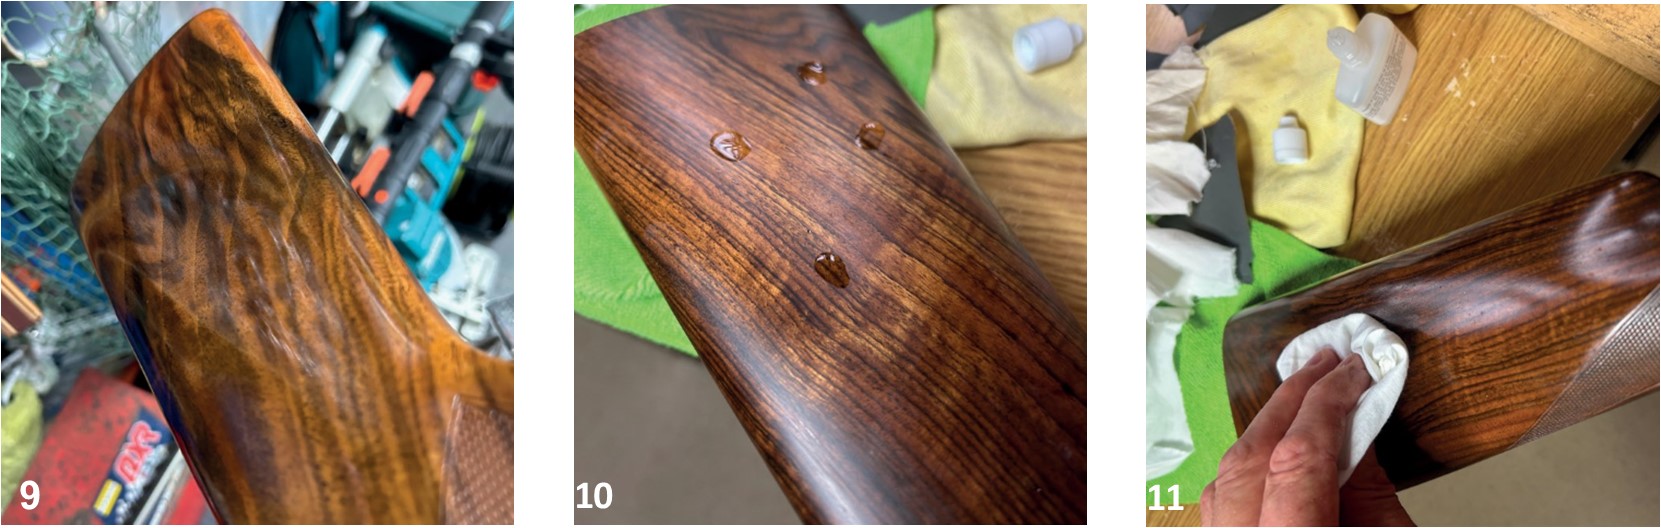
Repeat as necessary. This is where patience comes in, as to achieve a best finish just takes time. There is no set schedule. You will know when you are there as you will see a deep gloss with depth. Once you are happy, leave it to dry for a week, resisting the urge to touch and handle it (image 9).
For either the matt or gloss finish, before the final application of stock oil put the smallest amount of stock oil on a toothbrush and work into the chequering. Then apply your final coat on the rest of the stock.
Once it is dry you can apply some stock wax, which will give the finish added protection. Apply the wax with your finger in a circular motion and allow it to dry for five minutes, then add half a dozen drops per side of Slippery Dick’s wax additive (image 10) and polish off with a make-up removing pad until all the residue has gone (image 11). The end result is very pleasing and well worth the effort in my opinion.
Reassemble and go out and have some fun while admiring your handy work.
And there you have it. I have had disasters, and you may too, but all is not lost as you can always cut the finish back with wet and dry and go again. Don’t get frustrated if things don’t go to plan straight off.
EQUIPMENT
This is what you will need for the job. 1 sheet each of fine and medium sandpaper
1 sheet each of 1000 & 1200 wet-and- dry paper
1 bottle of alkanet oil (stain) 1 bottle of stock oil
1 bottle of gun stock grain filler or rottenstone powder (I prefer premixed)
1 stock wax and additive
1 pack of make-up removal pads 1 x bottle of acetone (nail varnish
remover) or paint stripper depending on your stock finish
Kitchen towel
An old toothbrush
An old clean T-shirt cut into 6″ squares to apply grain filler
Related Articles
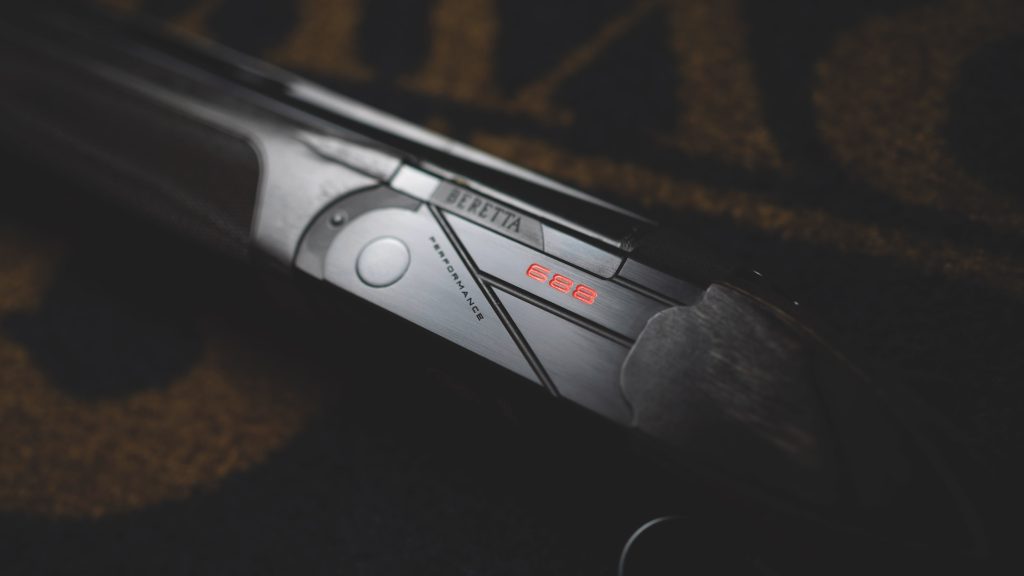
Beretta 688 review
A full review of the Beretta 688. Designed for serious clay shooters seeking competition performance, modern design and strong value.
By Lloyd Pattison

Why your shotgun cartridges are failing to eject
Cartridge ejection failures are highly frustrating, but this common problem might not be caused by your shotgun’s ejectors, but modern cost-saving cartridges themselves, explains gunsmith and shoote...
By Sporting Gun
Get the latest news delivered direct to your door
Subscribe to Sporting Gun
Sporting Gun has been the trusted voice of the shooting community since 1978, and a subscription is the best way to make sure you never miss a word of it.
For just £3.75 an issue – 46% less than the newsstand price – you’ll receive Britain’s leading shooting magazine delivered to your door before it hits the shelves. Every issue is packed with expert gundog training advice, in-depth shotgun and cartridge reviews, technique features from professional shots, pigeon and wildfowling coverage and the people and stories that define the sport.
In a world of endless scrolling, a magazine is something different – a moment to slow down, read properly and absorb knowledge that makes you a better shot. Back issues become a reference library worth keeping.